Create Stunning Papercut Greetings with SVG Files
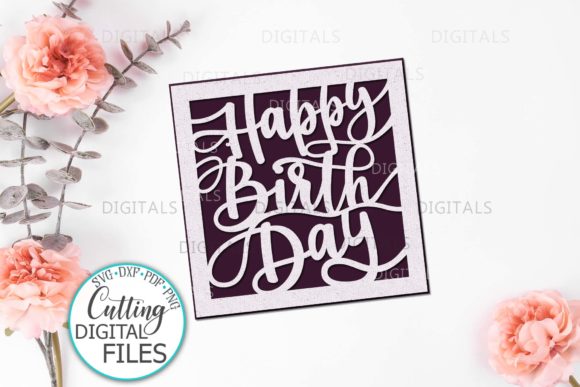
There’s something truly special about a handmade card, especially when it features intricate, layered paper art. For crafters and designers looking to create memorable birthday greetings, the Happy Birthday Card Papercut Svg Cut design offers a perfect blend of elegance and precision. This digital design asset is specifically engineered for paper cutting machines, transforming a simple sheet of cardstock into a stunning, three-dimensional masterpiece.
This particular design file is a versatile creative tool. It’s not just a single image; it’s a comprehensive package including SVG, DXF, EPS, PNG, and PDF formats. This ensures compatibility with a wide range of cutting software and hardware. Whether you use a Cricut Explore, Silhouette Cameo (Designer Edition), or Scan N Cut, the SVG file provides a clean, scalable vector path for flawless cutting. The DXF format caters to Silhouette Studio users without the Designer Edition or those using laser cutters, while the PDF and high-resolution PNG (300 dpi, transparent background) are ideal for printing or tracing.
Unleashing Creative Potential with a Papercut Design
The beauty of a papercut SVG lies in its dimensional appeal. Unlike a flat printed card, a layered cut creates shadow and depth, making the "Happy Birthday" message pop off the page. This design is ideal for more than just greeting cards. Consider these applications:
- Custom Invitations: Create show-stopping party invitations that set the tone for a celebratory event.
- Scrapbooking Embellishments: Add a delicate, textured focal point to a scrapbook page dedicated to a birthday celebration.
- Framed Art: A beautifully cut and layered piece can be framed as a unique piece of home decor or a personalized gift.
- Gift Tags & Toppers: Scale the design down to create elegant tags for presents or cupcake toppers for a party.
Tips for a Perfect Paper Cut Project
Achieving a professional result with this SVG cut file involves a few key considerations. First, material choice is critical. Using a sturdy 80 lb to 100 lb cardstock paper is recommended. This weight provides the necessary rigidity for the intricate cuts to hold their shape without tearing, ensuring your finished piece feels premium and durable.
Second, sizing matters. For the best visual impact and structural integrity, the design should be cut at a minimum of 5x5 inches. If you plan to create a full card in its unfolded mode, a size of 5x10 inches is advisable. This allows the delicate details of the script and decorative elements to be cut cleanly by your machine’s blade. Always perform a test cut on a scrap piece of your chosen cardstock to fine-tune your machine’s blade depth and pressure settings.
Beyond the Cut: Elevating Your Design
Once cut, the assembly is where the magic happens. Using foam adhesive squares between the layers will enhance the 3D effect, creating beautiful shadows. You can also experiment with colored cardstock, glitter paper, or even vellum for the top layer to add a unique texture and visual interest. The transparent PNG file is particularly useful here, allowing you to easily print a background pattern or color wash before applying your top papercut layer.
Choosing the right design assets, like this well-crafted SVG file, is fundamental to producing polished, professional-looking crafts. It saves hours of manual design work and ensures precision that is difficult to achieve by hand. For crafters, small business owners creating handmade goods, or designers looking for unique graphic elements, a reliable papercut design is an invaluable addition to your creative toolkit. It streamlines your workflow while guaranteeing a high-quality, visually appealing outcome that truly celebrates the occasion.